Reuse the Tariff settings page from your app
The fastest way to see what your customer sees and, if required, modify it, is to integrate Flatpeak into your support tools by building a version of the Tariff settings page inside your Support Dashboard: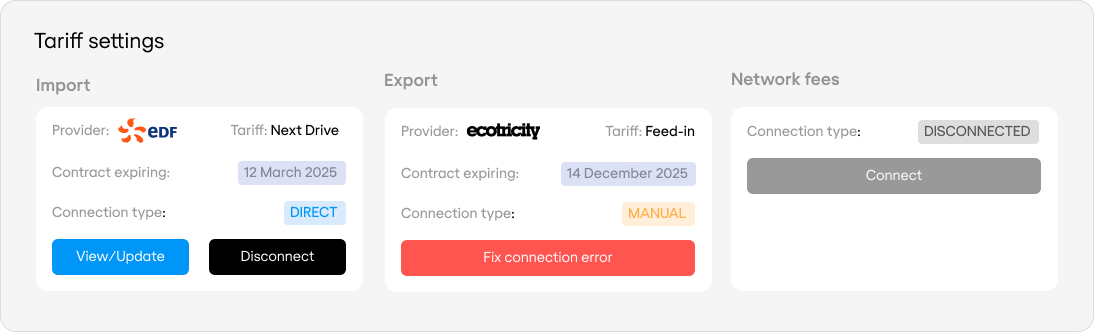
Implementation plan
Flatpeak assigns tariffs at the Location level, with each Location optionally linked to a Customer.Your system should support one-to-many relationships between customers and locations unless you only allow one location per customer.Alternatively, you can skip creating Customer objects in Flatpeak and limit your integration to Locations only.
| Step | Action |
|---|---|
| 1 | For each customer account, check if any Location has a Flatpeak Location ID. |
| 2 | For each Location with a Flatpeak Location ID, implement a status snippet similar to the illustration above. Refer to Tariff settings for details. |
| 3 | Allow your support team to view the tariff status and launch Connect on behalf of the customer and manage their tariff. |